3-Ingredient Flourless Peanut Butter Cookies
You do not need expensive specialty flours, xanthan gum, or chilling steps to make bakery-level gluten-free cookies. This classic flourless method uses the natural proteins and oils in creamy peanut butter along with a single egg to build the cookie’s structure.
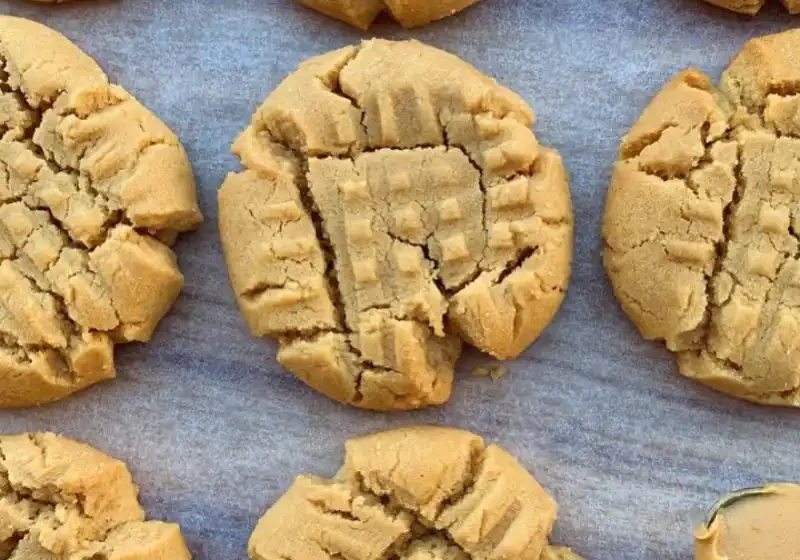
The result is a tender cookie with crisp edges, a dense chewy center, and an intense peanut butter flavor that flour-based cookies simply cannot match.
Quick Specs
| Metric | Details |
| Prep Time | 5 minutes |
| Bake Time | 10–12 minutes |
| Cooling Time | 10 minutes |
| Total Time | ~25 minutes |
| Yield | 12 to 14 cookies |
| Cost | Under $5 |
The 3 Core Ingredients
- Creamy Peanut Butter (1 cup / 250g): Standard commercial peanut butter (like Jif or Skippy) works best here.
- Granulated White Sugar (1 cup / 200g): Melts during baking to create the crisp exterior and binds with the peanut proteins. (You can also use half brown sugar for a deeper molasses chew).
- Large Egg (1 count): The structural binder. The egg proteins coagulate during baking to hold the fat and sugar together without any grain flour.
Flavor Enhancers (Optional): ½ tsp vanilla extract and a pinch of flaky sea salt on top.
Step-by-Step Instructions
Step 1: Mix the Dough
Preheat your oven to 350°F (175°C) and line a large baking sheet with parchment paper.
In a medium mixing bowl, combine the peanut butter, sugar, egg, and vanilla (if using). Stir vigorously with a wooden spoon or spatula for 60 to 90 seconds.
The Texture Shift: At first, the mixture looks separated and oily. Keep stirring—the sugar crystals and egg will suddenly emulsify the peanut oils, transforming into a thick, glossy, pliable dough that easily pulls away from the sides of the bowl.
Step 2: Scoop and Roll
Use a 1½-tablespoon cookie scoop (or spoon) to portion out round balls of dough. Roll them between your palms until smooth and place them about 2 inches apart on the prepared baking sheet.
Step 3: The Classic Fork Criss-Cross
Dip the tines of a table fork into a little granulated sugar (or water) so it doesn’t stick. Gently press down on each dough ball to flatten it slightly, then turn the fork 90 degrees and press again to form the iconic crosshatch pattern.
Why this matters: Because these cookies contain no flour or baking leaveners, they do not spread very much on their own in the oven. Pressing them down ensures they bake evenly throughout.
Step 4: Bake & The Mandatory Rest
Bake at 350°F (175°C) for 10 to 12 minutes.
The edges should look slightly golden and matte, but the centers will appear soft and fragile. Do not disturb them immediately. Let the cookies sit undisturbed on the hot baking sheet for 10 minutes before transferring them to a cooling rack.
The Science: Flourless cookies rely on egg and sugar proteins to set. Straight out of the oven, the hot sugars are molten; moving them right away will cause the cookies to crumble. As they cool, the fats and sugars firm up into a chewy, solid crumb.
Beginner Pro-Tips
- Natural vs. Conventional Peanut Butter: Conventional shelf-stable peanut butter (which includes hydrogenated oils) produces the most reliable, chewy texture. If using natural “drippy” peanut butter (just peanuts and salt), stir the jar thoroughly to incorporate all oil, and consider chilling the rolled dough balls for 15 minutes before pressing with the fork to prevent spreading.
- Want Chocolate? Fold in ½ cup of semi-sweet chocolate chips, or press a chocolate kiss into the center immediately after pulling them from the oven for instant peanut butter blossoms.
- Storage: Store cooled cookies in an airtight container at room temperature with a small piece of parchment paper between layers for up to 5 days.